Article-at-a-Glance
Identify the common causes of Vortex 250 Pro arm breaks and understand the material’s properties.
Learn a simple, step-by-step process for repairing broken arms with epoxy and carbon fiber patches.
Discover methods to reinforce your drone’s arms preemptively to avoid future damage.
Get practical tips on flying techniques and maintenance to prolong the life of your drone.
Understand when and how to troubleshoot any post-repair issues that may arise.
The common causes of PID tuning issues on Vortex 250 Pro arms can stem from various factors
1. Incorrect PID Tuning Method: One common cause could be following an incorrect PID tuning method, leading to unstable oscillations and unsatisfactory behavior[1].
2. Susceptibility to Vibrations: The D-term gain being too low can result in unsatisfactory behavior, as the D-term is sensitive to vibrations. Higher D-gain allows for higher P-gain settings, but excessive vibrations can affect performance[3].
3. Impact of PID Settings on Flight Stability: Slow oscillations mistaken for high P-gain can actually be caused by the I-term overpowering the P-term. Lowering the P-gain further can exacerbate slow I-term oscillations, affecting flight stability[3].
4. Frame Vibrations and Motor Oscillations: Frame vibrations and motor oscillations can impact PID tuning, with vibrations affecting the P-term and potentially causing instability during flight[3].
5. Motor and Propeller Balance: Balancing motors and props, along with using a stiff frame, can help reduce vibrations and improve flight characteristics, addressing issues related to PID tuning[3].
The common causes of PID tuning issues on Vortex 250 Pro arms include incorrect tuning methods, sensitivity to vibrations, the impact of PID settings on flight stability, frame vibrations, motor oscillations, and the importance of motor and propeller balance for optimal performance.
Vortex 250 Pro’s Known Weakness: The Arms
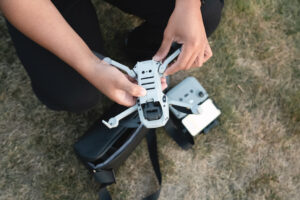
So, you’ve taken a nosedive and now you’re left with a Vortex 250 Pro that’s more of a stationary model than a racing champion. Don’t worry, you’re not alone. The arms of this drone are its Achilles heel, known for giving out under the stress of a hard crash. But with a bit of patience and the right approach, you can have it soaring again in no time.
Understanding the Fragility
The arms of your Vortex 250 Pro are made of carbon fiber, a material chosen for its lightweight and strength, essential for high-speed racing. But, just like glass, carbon fiber is brittle and can shatter upon impact. Recognizing this is the first step towards a successful repair job.
Likely Break Points and Impact Damage
Most breaks occur at points where stress is highest during a crash, typically near the motor mounts or at the center where the arm meets the body. When you inspect your drone after a mishap, these are the first places you should check.
Step-by-Step Arm Repair Guide
Let’s roll up our sleeves and get to the nitty-gritty of repairing your drone’s arms. It might sound daunting, but I’ll walk you through each step to make sure you can handle it with confidence.
Gathering the Necessary Materials
Before diving in, make sure you have everything you need. Here’s a quick list, but for a more comprehensive guide, check out the Ultimate Drone Racing Prep Guide.
Epoxy glue specifically designed for carbon fiber
Carbon fiber patches or tape
Fine-grit sandpaper
Clamps or tape to hold the repair while it cures
Clean cloth and alcohol for surface preparation

Prepping the Broken Arm
Preparation is key. Start by using the sandpaper to rough up the broken surfaces; this gives the glue something to hold onto. Then, clean the area with a cloth dampened with alcohol to remove any dust or oils. This ensures the epoxy will bond properly.
Applying Epoxy and Carbon Fiber Patches
Now, mix your epoxy according to the instructions and apply it to the broken edges. Place the carbon fiber patch over the break, and make sure it’s fully saturated with the glue. Use clamps or tape to keep everything tight while the epoxy cures. Remember, patience is a virtue here—the stronger the bond, the better the repair.
Curing the Repair for Optimal Strength
Curing time can vary, but it’s usually around 24 hours for the epoxy to fully harden. Don’t rush this process; a solid cure is what gives the repair its strength. While you wait, you can start planning your next flight, thinking about those moves that will keep your drone in one piece.
While repairing your Vortex 250 Pro is crucial, it’s just as important to take measures to prevent future breaks. By reinforcing the arms of your drone, you can improve its durability and reduce the chances of damage during those inevitable crashes.
Strengthening Your Vortex 250 Pro Arms: Preemptive Measures
Reinforcement is not about adding bulk; it’s about strategic strengthening. Let’s look at how you can beef up those arms without compromising the agility and speed of your Vortex 250 Pro.
Choosing the Right Materials for Reinforcement
When it comes to reinforcing the arms of your drone, you want materials that are lightweight yet strong. Carbon fiber tape is a popular choice. It’s easy to apply, and it adds significant strength without much weight. Another option is heat shrink tubing, which can provide a layer of protection and help keep everything held together tightly.
How to Apply Carbon Fiber Tape for Added Strength
Applying carbon fiber tape is straightforward. Cut a piece of tape to the length of the arm and apply it along the bottom, where the arm faces the most stress during flight. Use a heat gun or hair dryer to gently heat the tape after application, which helps it bond to the arm’s surface for a more secure fit.
Using Heat Shrink Tubing to Protect Against Crashes
Heat shrink tubing is another great way to add a layer of protection. Simply slide the tubing over the arm, apply heat, and it will shrink down, forming a protective layer. This is particularly useful around the joints and motor mounts, where impacts are most likely to cause damage.
Preventive Tips to Avoid Future Breaks
Prevention is better than cure, as they say, and this is especially true for drone racing. Here are some tips to help you avoid future breaks:
Proper Flying Techniques and Prop Selection
First and foremost, practice makes perfect. Hone your flying skills to avoid crashes. Also, choose the right props for your flying style and the conditions. Heavier props can cause more stress on the arms during a crash, so consider lighter options if you’re prone to accidents.
Safe Storage and Transport to Protect Your Drone
Your drone is most vulnerable when it’s not in the air. Invest in a sturdy carrying case to protect it from bumps and jostles during transport. Make sure the case is well-padded and that your drone fits snugly inside.
When storing your drone, keep it in a place where it won’t fall or have objects fall on it. A dedicated shelf or hook on the wall is a great way to keep it safe when not in use.
Use a carrying case with custom foam inserts that fit your drone’s shape.
Avoid leaving your drone in a car where temperatures can fluctuate and cause components to warp or crack.
Never stack heavy items on top of your drone, even when it’s in its case.
Keeping Spare Parts on Hand for Quick Turnaround
Despite your best efforts, accidents happen. Keeping spare arms and other critical components on hand means you can make repairs quickly and get back to flying. It also means you can experiment with repairs and reinforcements without the pressure of getting it right on the first try.
Troubleshooting Post-Repair Issues
After you’ve made your repairs, it’s crucial to test your drone thoroughly before taking it back to full speed. Sometimes, even the best repairs can alter the balance of your drone or introduce vibrations that weren’t there before.
If you notice any unusual behavior, like wobbling or difficulty in maneuvering, go back and check your work. Make sure everything is aligned properly and that the repair hasn’t affected the structural integrity of the arm. If necessary, rebalance your props to compensate for any changes.
And if you’re ever in doubt about your repair, don’t hesitate to seek advice from more experienced pilots or take your drone to a professional. It’s better to be safe than sorry, especially when you’re flying at high speeds.
What to do if the Drone Vibrates or Flies Erratically
After you’ve repaired the arms of your Vortex 250 Pro, it’s not uncommon to experience some vibration or erratic flight. This can happen if the repaired arm isn’t perfectly balanced with the others. To fix this, you can:
Check the balance of your props; even a small nick can throw off the balance.
Ensure that all screws are tightened equally so that there’s no play in the arms.
Inspect the repaired area for any unevenness or excess material that could be causing the imbalance.
If the vibration persists, you might need to rebalance the entire drone. You can do this by adding small weights to the arms opposite the repair until the drone flies smoothly again. It’s a trial-and-error process, but it’s crucial for maintaining the performance of your drone.
Remember, a smooth flight is a fast flight. Take the time to get this right, and your Vortex 250 Pro will be back to its agile best, slicing through the air with precision.
Most importantly, don’t ignore these issues. Vibration can lead to more significant problems down the line, such as loosening of components or even another break. Address it as soon as possible to keep your drone in top condition.
When to Seek Professional Help
If you’ve tried repairing and reinforcing your drone’s arms and you’re still experiencing issues, it might be time to seek professional help. Here are a few signs that professional expertise is needed: If your Vortex 250 Pro is still not performing as expected after your repair attempts, consulting with the manufacturer or a professional repair service may be your best option.
If the drone is still vibrating after rebalancing.
– If the drone doesn’t respond correctly to controls post-repair.
– If you notice any structural deformities that you’re not equipped to fix, consider seeking advice on the ImmersionRC Vortex 250 Pro forum.
There’s no shame in seeking help. In fact, it’s a smart move to ensure that your Vortex 250 Pro is safe to fly and performs at its best. A professional can provide a thorough assessment and expert repairs that might be beyond the scope of DIY fixes.
Frequently Asked Questions
Here are some common questions that come up when dealing with Vortex 250 Pro arm repairs:
Can Vortex 250 Pro arms be repaired with basic tools at home?
What is the best type of epoxy for carbon fiber repairs?
How long does it typically take for a repaired arm to cure?
Is reinforcing the arms necessary if I fly cautiously?
Where can I find high-quality replacement arms for my Vortex 250 Pro?
Can Vortex 250 Pro arms be repaired with basic tools at home?
Yes, you can repair Vortex 250 Pro arms at home with basic tools. You’ll need epoxy glue, carbon fiber patches, sandpaper, and clamps or tape. With these items, you can perform the repairs as I’ve outlined above. However, make sure you’re comfortable with the process and take your time to ensure a strong repair.
What is the best type of epoxy for carbon fiber repairs?
The best type of epoxy for carbon fiber repairs is one that’s specifically designed for bonding carbon fiber materials. These epoxies are formulated to handle the stresses that drones encounter during flight. Look for products with high tensile strength and good impact resistance.
It’s also important to follow the mixing and curing instructions precisely. Incorrectly mixed or cured epoxy can result in a weak bond, which is likely to fail under the pressures of flight.
How long does it typically take for a repaired arm to cure?
Typically, it takes about 24 hours for a repaired arm to cure fully. However, this can vary based on the epoxy you’re using, so always check the product’s instructions. Resist the urge to rush the process; a full cure is essential for the strength and longevity of the repair.
While you’re waiting for the epoxy to cure, you can use the time to inspect the rest of your drone for any other potential issues or perform routine maintenance.
Is reinforcing the arms necessary if I fly cautiously?
Even if you fly cautiously, reinforcing the arms of your Vortex 250 Pro can still be a good idea. It’s like wearing a seatbelt in a car; you don’t plan on crashing, but if it happens, you’ll be glad you took the precaution. Reinforcing the arms can help prevent breaks and extend the life of your drone.
Where can I find high-quality replacement arms for my Vortex 250 Pro?
You can find high-quality replacement arms for your Vortex 250 Pro from the manufacturer, specialty drone shops, or online retailers. Make sure to purchase genuine parts or those from reputable third-party manufacturers to ensure compatibility and quality. Keeping spare arms on hand can save you from a long downtime if you have a crash and need to replace an arm.
And remember, whether you’re repairing, reinforcing, or replacing, the key to drone longevity is in the care and precision you apply to each step of the process. Fly smart, maintain regularly, and you’ll keep your Vortex 250 Pro in the air for many races to come.
Citations:
[1] https://electronics.stackexchange.com/questions/380805/pid-tuning-issue
[2] https://www.rcplanet.com/common-r-c-car-steering-problems-and-how-to-fix-them/cp780
[3] https://www.reddit.com/r/Multicopter/comments/4lk8xg/pid_tuning_tip_dont_mistake_slow_oscillations_as/
[4] https://www.bhphotovideo.com/lit_files/162636.pdf
[5] https://oscarliang.com/betaflight-firmware-setup/


Leave a Reply