Airborne Dreams: Assemble Your EMAX Tinyhawk 2
There’s a certain thrill to flying a drone you’ve built with your own hands. The EMAX Tinyhawk 2 is the perfect canvas for crafting that experience. Whether you’re a seasoned pilot or just starting out, assembling your Tinyhawk 2 is an adventure that’s both rewarding and educational. Let’s get your drone off the ground!
Key Takeaways: Drone Building Essentials
Before we dive into the assembly process, here are some quick insights to keep in mind:
- Know your kit: Familiarize yourself with all the components before starting.
- Stay organized: Keep your workspace tidy and your parts sorted.
- Patience is key: Take your time with each step to avoid mistakes.
- Customization is fun: Think about personal touches to make your drone unique.
- Test thoroughly: Always test your drone’s functions before the maiden flight.
What You’ll Need: The Component Checklist
Ready to start building? First, let’s ensure you have everything necessary:
- The EMAX Tinyhawk 2 kit, including the frame, motors, and electronic components.
- A set of precision screwdrivers for those tiny screws.
- A soldering iron and some solder for securing electrical connections.
- A clean workspace with good lighting.
- Patience and enthusiasm – the most important tools of all!
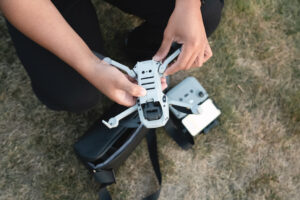
Prep Work: Understanding Your Tinyhawk 2 Kit
Unboxing your Tinyhawk 2 is like opening a treasure chest. Inside, you’ll find a myriad of components, each with a specific role in your drone’s performance. Take a moment to lay out all the parts and familiarize yourself with them. This will save you time later and help you understand how each piece fits into the bigger picture.
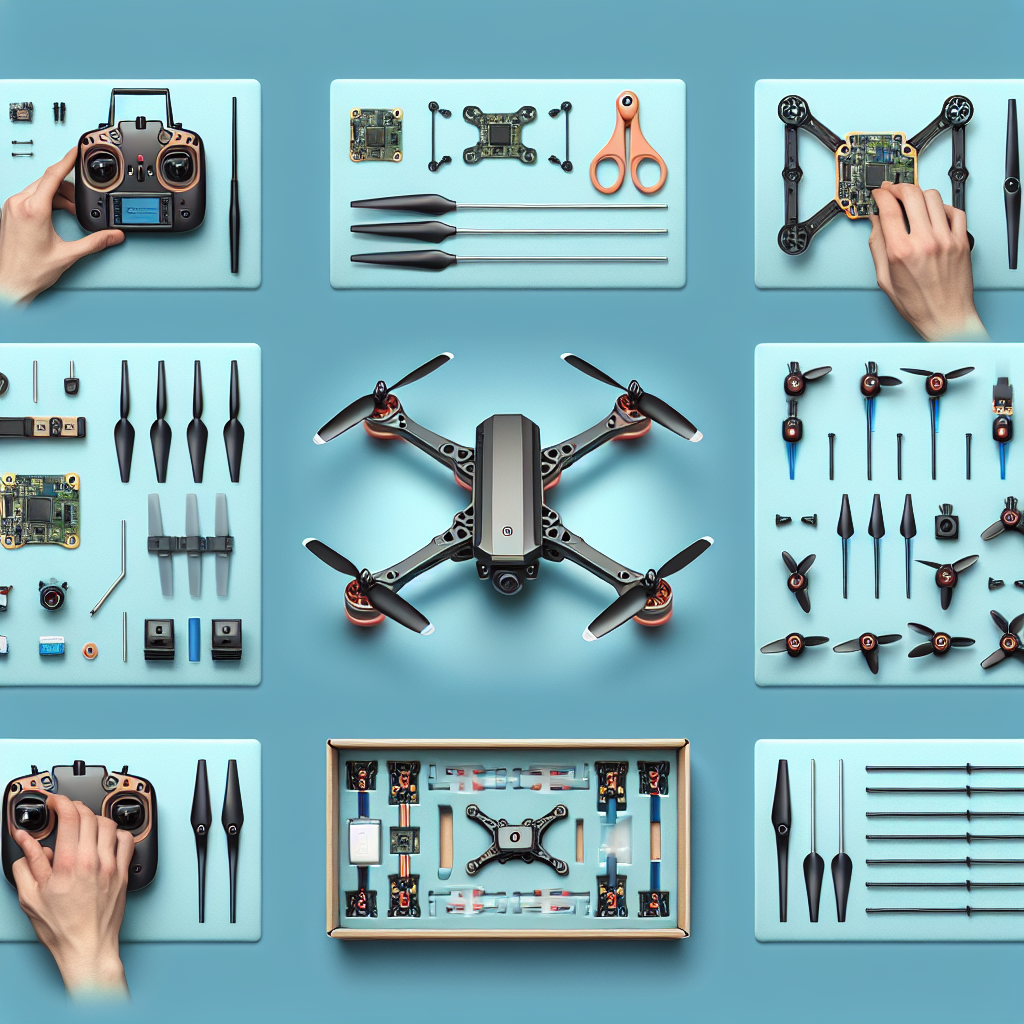
Decoding the Parts: A Closer Look
Here’s a brief rundown of what you’ll find in your kit:
Frame: The skeleton of your drone. It’s lightweight yet durable, designed to withstand those inevitable crashes.
Motors: These are the muscles of your Tinyhawk 2. They provide the thrust that propels your drone into the sky.
Flight Controller: Consider this the brain. It interprets your commands and translates them into action.
Electronic Speed Controllers (ESCs): These regulate the power to the motors, giving you smooth and responsive control.
FPV Camera and VTX: Your eyes in the sky, providing you with a live video feed as you fly.
Laying the Foundation: Frame Assembly
Building a drone starts with its frame – it’s the foundation that holds everything together. Begin by attaching the arms to the central body. Make sure each screw is tight, but be careful not to over-tighten and strip the threads. A good fit means a solid build, and that’s what we’re aiming for.
With the frame assembled, you’ll start to see your Tinyhawk 2 take shape. It’s a bit like a puzzle, where every piece fits perfectly to create something amazing. Remember, this is more than just a toy; it’s a high-performance machine that’s going to soar through the air at incredible speeds. Respect the build, and you’ll be rewarded with a drone that’s both sturdy and nimble.

Motor Magic: Spinning Your Tinyhawk to Life
Now that your frame stands ready, it’s time to give it some muscle. The motors are the heart of your drone’s propulsion system. They’re going to spin your propellers and send your Tinyhawk 2 zipping through the air. It’s crucial to get this step right, as the motors impact everything from speed to control.
Choosing the Right Motors
Your Tinyhawk 2 kit comes with motors specifically designed for its size and weight, so you won’t have to worry about picking the right ones. However, it’s good to understand that these brushless motors are engineered for a balance of power and efficiency, providing you with the best possible flight experience. When installing, ensure that each motor is seated properly and that the wires are not twisted or strained.
Securing Motors: Tips and Tricks
Mounting your motors is a step where precision matters. Align them carefully with the mounting holes on the frame arms and use the provided screws to secure them. Here’s a pro tip: use a thread locker like Loctite on the screws to prevent them from vibrating loose during flight. Just a drop will do—this isn’t the place for overdoing it. And remember, the wires should be routed neatly to where they’ll connect with the electronic speed controllers (ESCs).
Brain of the Bird: Installing the Flight Controller
The flight controller is your drone’s brain, and it’s time to bring it into the mix. This little circuit board is a marvel, packed with sensors and processors that keep your drone stable and responsive. Installing it correctly is key to a successful flight, so let’s get it right.
Function and Features of the Tinyhawk FC
The flight controller in your Tinyhawk 2 kit is a piece of tech wizardry. It’s programmed to make flying as intuitive as possible, smoothing out your inputs and helping you maintain control. It’s also where you’ll connect your receiver, so your commands are translated into action. Take a moment to appreciate this component – it’s the unsung hero of your drone.

Wiring Simplified: Soldering Step-by-Step
Soldering can seem intimidating, but it’s just like gluing things together, only with metal. Start by tinning the pads on the flight controller – that means melting a little solder onto them to make attaching wires easier. Then, tin the ends of the wires from your motors and ESCs. When you heat both tinned parts and touch them together, they’ll bond instantly. Keep your soldering iron tip clean, use just enough solder to make the connection, and you’ll have a solid, conductive joint. Remember, a good solder joint looks shiny and smooth, not lumpy or dull.
The Eyes in the Sky: Camera and VTX Setup
The FPV camera and video transmitter (VTX) are what allow you to see from your drone’s perspective, turning an ordinary flight into an immersive experience. Getting this setup right is crucial for the full FPV experience, so let’s get to it.
Choosing Your FPV Camera
The camera included with your EMAX Tinyhawk 2 is selected to offer a good balance between field of view, resolution, and light handling. It’s important to mount the camera securely to the frame, usually at the front, with a clear view ahead. The angle at which you set your camera can affect your perception of speed and altitude, so start with a moderate angle that gives you a good view of the horizon while flying.
Getting Clear Signals: Video Transmitter Installation
Next up is the VTX, which broadcasts the video signal from your camera to your FPV goggles. It’s a small component, but its placement and setup are key to clear video feeds. Mount the VTX securely onto the frame, ensuring it has good airflow to keep it cool. Connect it to the camera and the flight controller following the instructions in your kit. The antennas should be positioned to minimize the chance of damage during a crash. It’s also wise to check the regulations in your area about transmission power and ensure your VTX is set accordingly.
Propellers and Power: Completing the Mechanical Assembly
With the electronics in place, it’s time to focus on the propellers and power system. These are the final mechanical pieces that will bring your Tinyhawk 2 to life.
Finding the Perfect Propellers
Your Tinyhawk 2 kit comes with propellers designed to work harmoniously with your motors. When attaching the propellers, ensure they’re securely fastened but not over-tightened, as you may need to remove them for maintenance. Pay attention to the direction they’re supposed to spin and match them to the correct motor. A mismatch here could mean your drone flips over instead of lifting off!

Battery Basics: Safe Attachment and Usage
The battery is your drone’s fuel tank, and it’s vital to handle it with care. Your Tinyhawk 2 uses a specific type of battery, so make sure you’re using the recommended one. Attach the battery to the frame with a strap or mount that holds it securely but also allows for quick changes. Always monitor the battery’s charge level and never over-discharge it, as this can reduce its lifespan. When charging, use a charger that’s designed for the type of battery you have, and never leave a charging battery unattended.
With the propellers and battery in place, your EMAX Tinyhawk 2 is nearly ready to take to the skies. You’ve built it piece by piece, and it’s a testament to your dedication and skill. In the next steps, we’ll cover testing, calibration, and your first flight. But for now, take a moment to admire your work – you’ve built a drone that’s ready to race through the air, and that’s no small feat.
Testing Phase: Ensuring Your Drone is Ready for Takeoff
Before your Tinyhawk 2 takes its maiden flight, it’s essential to run through a series of tests. This phase is all about making sure everything works as it should. It’s a bit like a pre-flight checklist pilots go through, ensuring safety and success once airborne.
Initial Setup: A Comprehensive Guide
Start with a bench test. Power up your drone without the propellers and connect it to the controller. Check that each motor spins when prompted and that the directions correspond with your controller inputs. It’s also the perfect time to bind your drone to the controller, following the instructions provided in your kit. This step is crucial; it’s the handshake between your drone and its remote.
- Ensure the motors respond correctly to throttle inputs.
- Verify the direction of motor rotation matches the propeller installation.
- Bind the drone to the controller securely.
- Inspect for any loose screws or components.
- Check the battery voltage and ensure it’s fully charged.
Calibration: Tweaking for Optimal Performance
Calibration fine-tunes your drone’s sensors and ensures it understands its orientation. Most flight controllers come with a calibration function that you can access through the controller or an app. Follow the prompts to rotate and tilt your drone in various directions. This process helps the flight controller accurately interpret its position in the air, which is key to stable flight. Think of it like teaching your drone the difference between up and down, left and right.
- Calibrate the gyroscopes to ensure level flight.
- Adjust the ESCs so they all respond uniformly to throttle changes.
- Set up fail-safes to prepare for any communication loss scenarios.
- Test the range of your controller in a safe, open area.

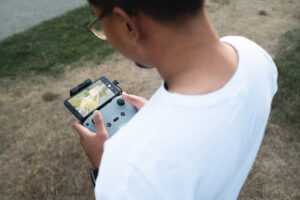
Flight School: Tips and Pilot Practices
With your Tinyhawk 2 assembled, tested, and calibrated, it’s time to learn the art of flying. Remember, every pilot started as a beginner, and practice is the path to perfection. Let’s start with the basics and gradually move to more thrilling maneuvers.
Basic Maneuvers: Getting Comfortable with Controls
Your first few flights should focus on understanding how your drone responds to your commands. Find a safe, open area and practice hovering at different heights. Then, try moving in all four directions – forward, backward, left, and right. Keep your movements gentle; it’s not about speed, it’s about control. Gradually, you’ll build muscle memory, and controlling your drone will become second nature.
- Practice hovering at a fixed point to gain stability.
- Learn to control altitude with smooth throttle adjustments.
- Master directional flight by moving slowly in each direction.
- Get a feel for how your drone stops and turns.
Advanced Techniques: Pushing Your Tinyhawk’s Limits
Once you’re confident with basic flight, it’s time to challenge yourself. Start with simple tricks like figure-eights and banked turns. These maneuvers help you understand momentum and how to maintain control at higher speeds. As you progress, experiment with flips and rolls. These require precise throttle control and timing but are incredibly satisfying when executed well. Always practice new tricks at a safe altitude, giving yourself room for error.
- Attempt banked turns to learn about managing momentum.
- Practice flips and rolls at a safe height to avoid crashes.
- Try out different flight modes, like angle or acro, to expand your skills.
- Use simulators to safely push the boundaries without risking your drone.
Remember, every flight is a learning experience. Each time you take off, you’ll discover more about what your Tinyhawk 2—and you as a pilot—are capable of. Embrace the journey, and you’ll soon be zipping through the skies with the best of them.
Frequently Asked Questions
Got questions? You’re not alone! Here are some of the most common queries from fellow drone builders and pilots, along with clear, concise answers to help you get your Tinyhawk 2 up and flying with confidence.
How long does it take to assemble the EMAX Tinyhawk 2?
Assembly time can vary based on your experience with building drones and soldering. For a beginner, setting aside a couple of hours should give you enough time to assemble the Tinyhawk 2 without rushing. Remember, it’s not a race. Taking your time to understand each step and ensuring solid connections can save you troubleshooting time later on.
Can I use any FPV goggles with the Tinyhawk 2?
Most modern FPV goggles will work with the Tinyhawk 2, as long as they support the video transmission standard used by your drone’s VTX. Before you buy or use a pair, check that they’re compatible with the frequencies and channels that your Tinyhawk 2 transmits on. This ensures you’ll get a clear, crisp video feed for the best flying experience.
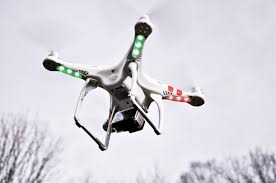
What is the best environment for flying the Tinyhawk 2?
The Tinyhawk 2 shines in both indoor and outdoor environments. If you’re new to flying, start indoors in a spacious room free from breakables. This will help you get a feel for the controls without the interference of wind. As you gain confidence, take your Tinyhawk 2 outdoors, preferably on a calm day, to a safe, open area like a park or a field. Always be mindful of local regulations and avoid crowded places.

How can I ensure the longevity of my Tinyhawk 2?
To keep your Tinyhawk 2 in top condition, follow these tips:
Building and flying your EMAX Tinyhawk 2 is more than a hobby; it’s a journey into the exciting world of FPV drone racing. With each step of the assembly, you’re not just putting together a machine; you’re crafting an experience that will take you to new heights—literally and figuratively. The patience and care you put into building your Tinyhawk 2 will reward you with countless hours of flying fun. So take a deep breath, grab your tools, and embark on the thrilling adventure of drone assembly and piloting. The sky’s the limit!